How to automatically extract EXIF metadata from photos in Airtable without code
Airtable is Google Sheet on steroids. One of the super useful features is the attachment field in a table, where you can add photos, PDFs, or any kind of document you can think of. There is even a guide for creating a beautiful gallery view. If you use Airtable to organize photos by their metadata, here is a no code solution using Zapier and AirExif.
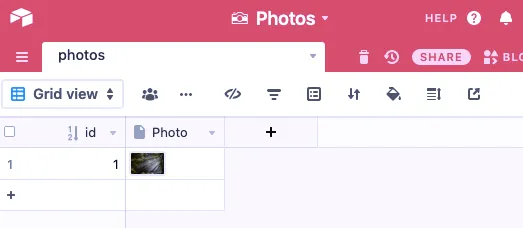
Let’s assume we have a Photos base, and a photos table. In the Photo field there is a picture of sun rays in Bavaria. We also have an Autonumber id field.
There are a lot of data we can extract from EXIF metadata. In this tutorial, assume we would like to extract the following: Artist, Camera Make and Model, Flash, White Balance, GPS Latitude, GPS Longitude and the Date and Time the photo was taken. In the same base we create an empty table called metadata with these fields, and an Autonumber id field to match the records in the photos table.

AirExif provides an API to extract EXIF metadata from a photo URL. We will use it in Zapier to create a Zap that automatically populates the fields in the metadata table whenever a new photo is added to the photos table.
AirExif has a dead simple pricing plan, we can get metadata for 100 photos for free every month, after that it’s $0.02 per request, no hidden charges.
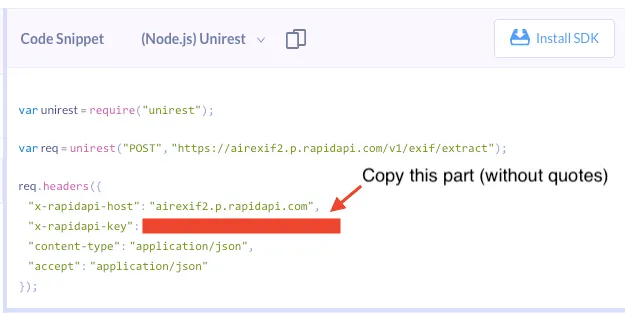
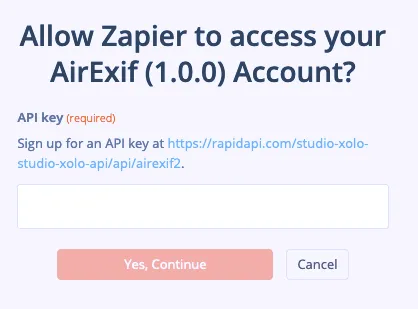
After signing up for AirExif, all we need is to copy our API key (without quotes), which can be found in the testing console, right after "x-rapidapi-key" , we should have it ready for creating the Zap.
Go to Zapier and start creating a Zap. In Step 1, choose Airtable and “New Record in View” as trigger event, then connect our Airtable account with Zapier.
Then we tell Zapier to watch for new records in the Photos table.
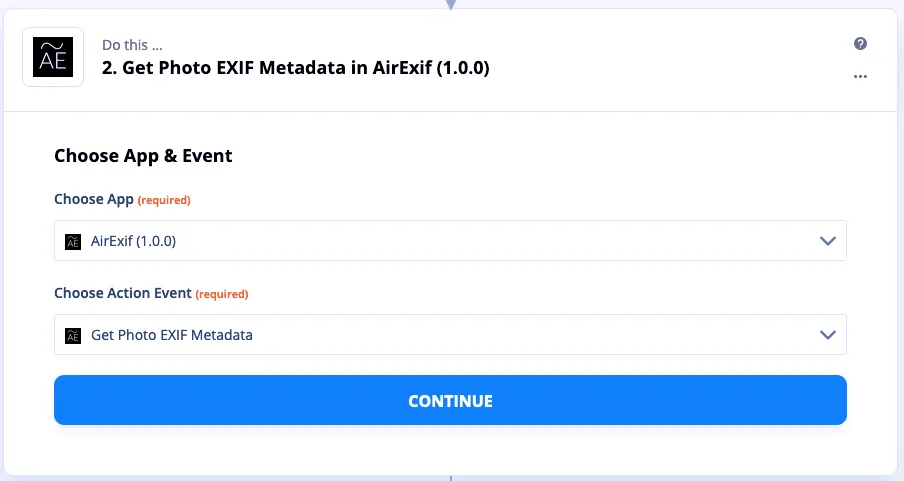
In the next step we choose AirExif, Get Photo EXIF metadata action.
Now we need to connect AirExif to Zapier. Simply paste our AirExif API key in the dialog and click continue.
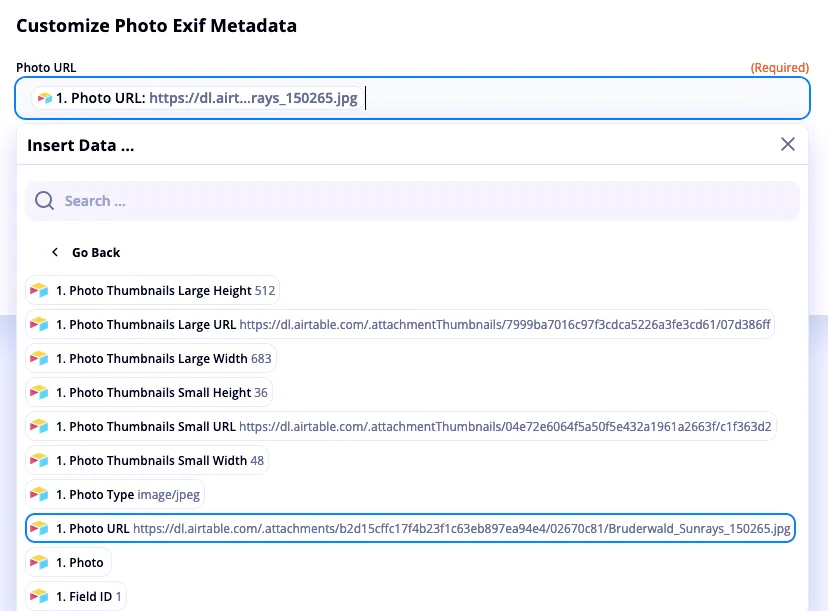
Next we will build the “data pipeline”. Select “Photo URL” from the list of fields, click “Show All Options” if it doesn’t show up automatically. Test and continue.
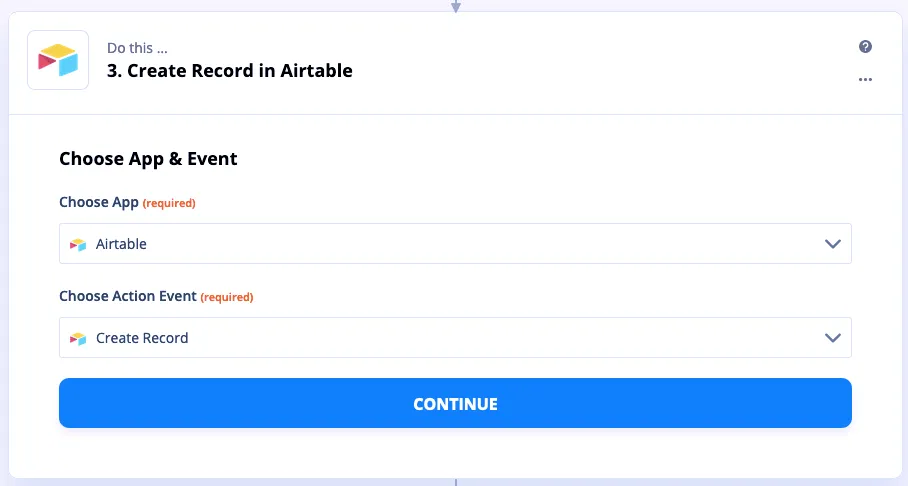
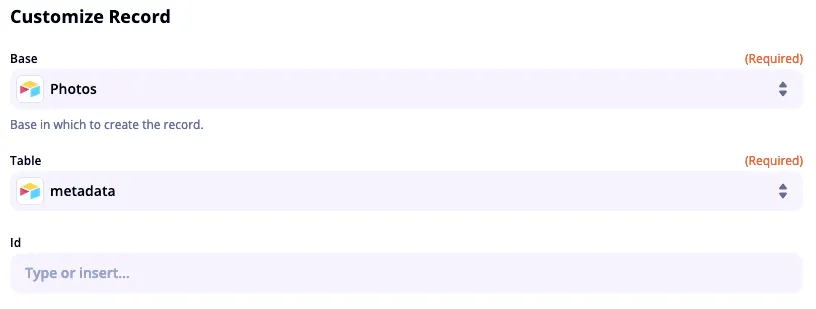
Now we’re ready to populate the fields in our metadata table. We will add a new step in our Zap. We choose Airtable and Create Record action, then connect our account.
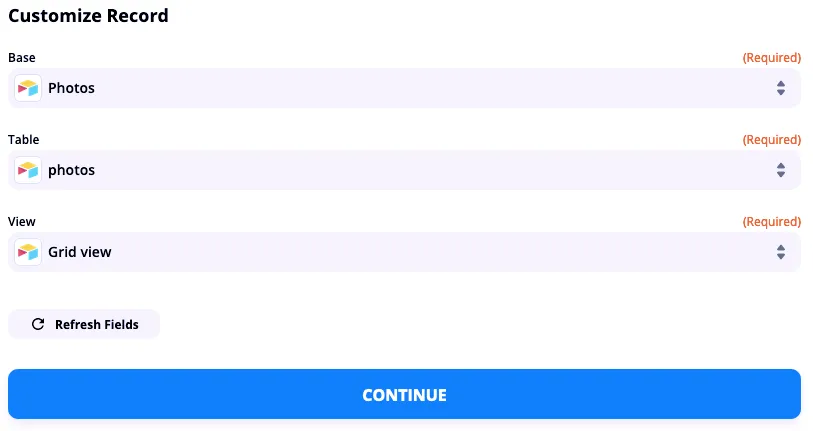
We specify the metadata table to be updated with new records. Note that we do not need to populate the id field, since it increments automatically.
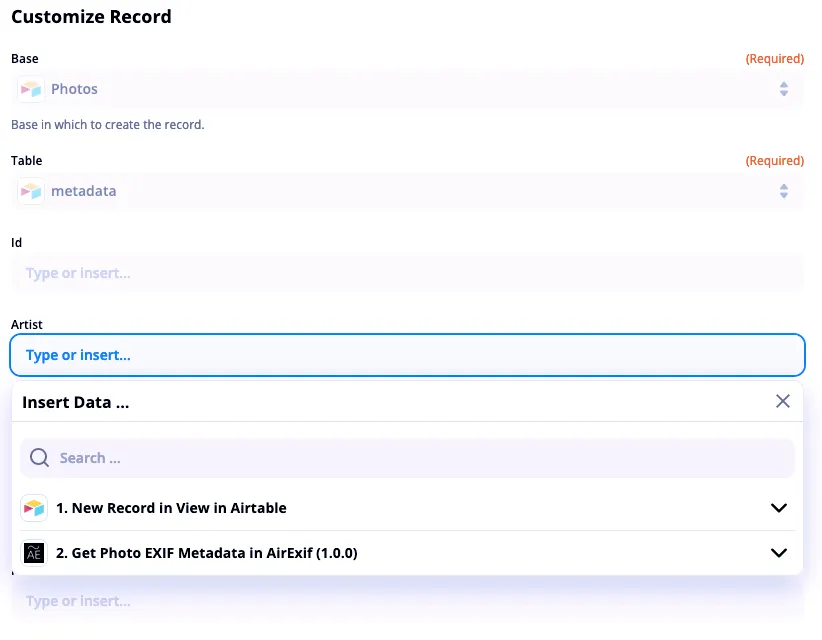
We will walk through how to populate the Artist field step by step, other fields can be populated in the same way.
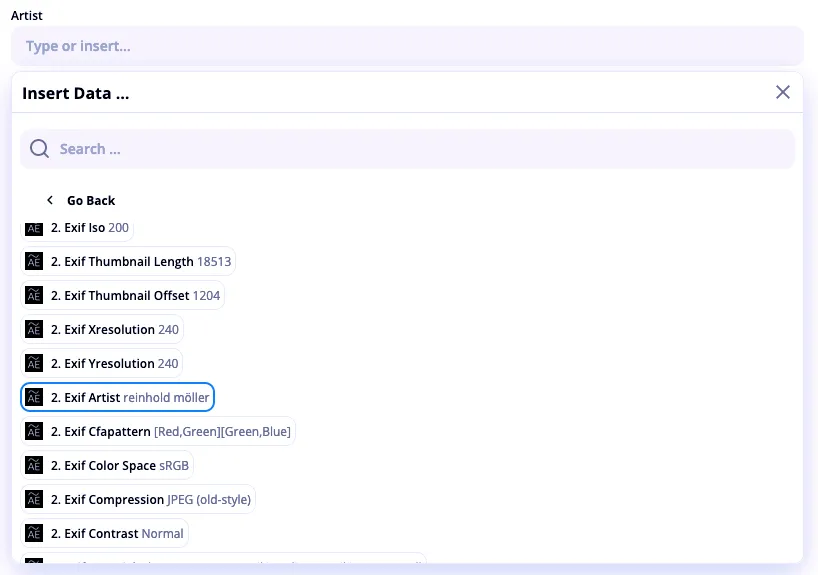
At the prompt for Artist, select Step 2, Show All Options.
Select Exif Artist from the list of options.
Repeat the same for other fields, then Continue.

After hitting Test and Continue, we got the data in our metadata table. 😃

Turn on the Zap. Now we’re on autopilot!
💡AirExif’s Zapier integration is currently invite only. Multi-step Zaps require Zapier’s Starter Plan or above. 👉 Click here to get access to AirExif’s Zapier integration!
If you have large amount of data to process, 👉 click here to let us know, we can help you optimize the workload and come up with a pricing plan that suits you.
Can’t find that metadata field you’re looking for? 👉 Tell us about it. We can add custom features for you.
Have questions about AirExif or integration with Airtable and Zapier? 👉 Click here to send us a message!